On June 23, 2026, I headed out to image for the night, but my selected target wasn’t quite high enough to breach the neighbouring house’s roof. As I waited, I turned my attention to the Moon, which was in its Waxing Gibbous phase, roughly 55%–60% illuminated, just a day past First Quarter.
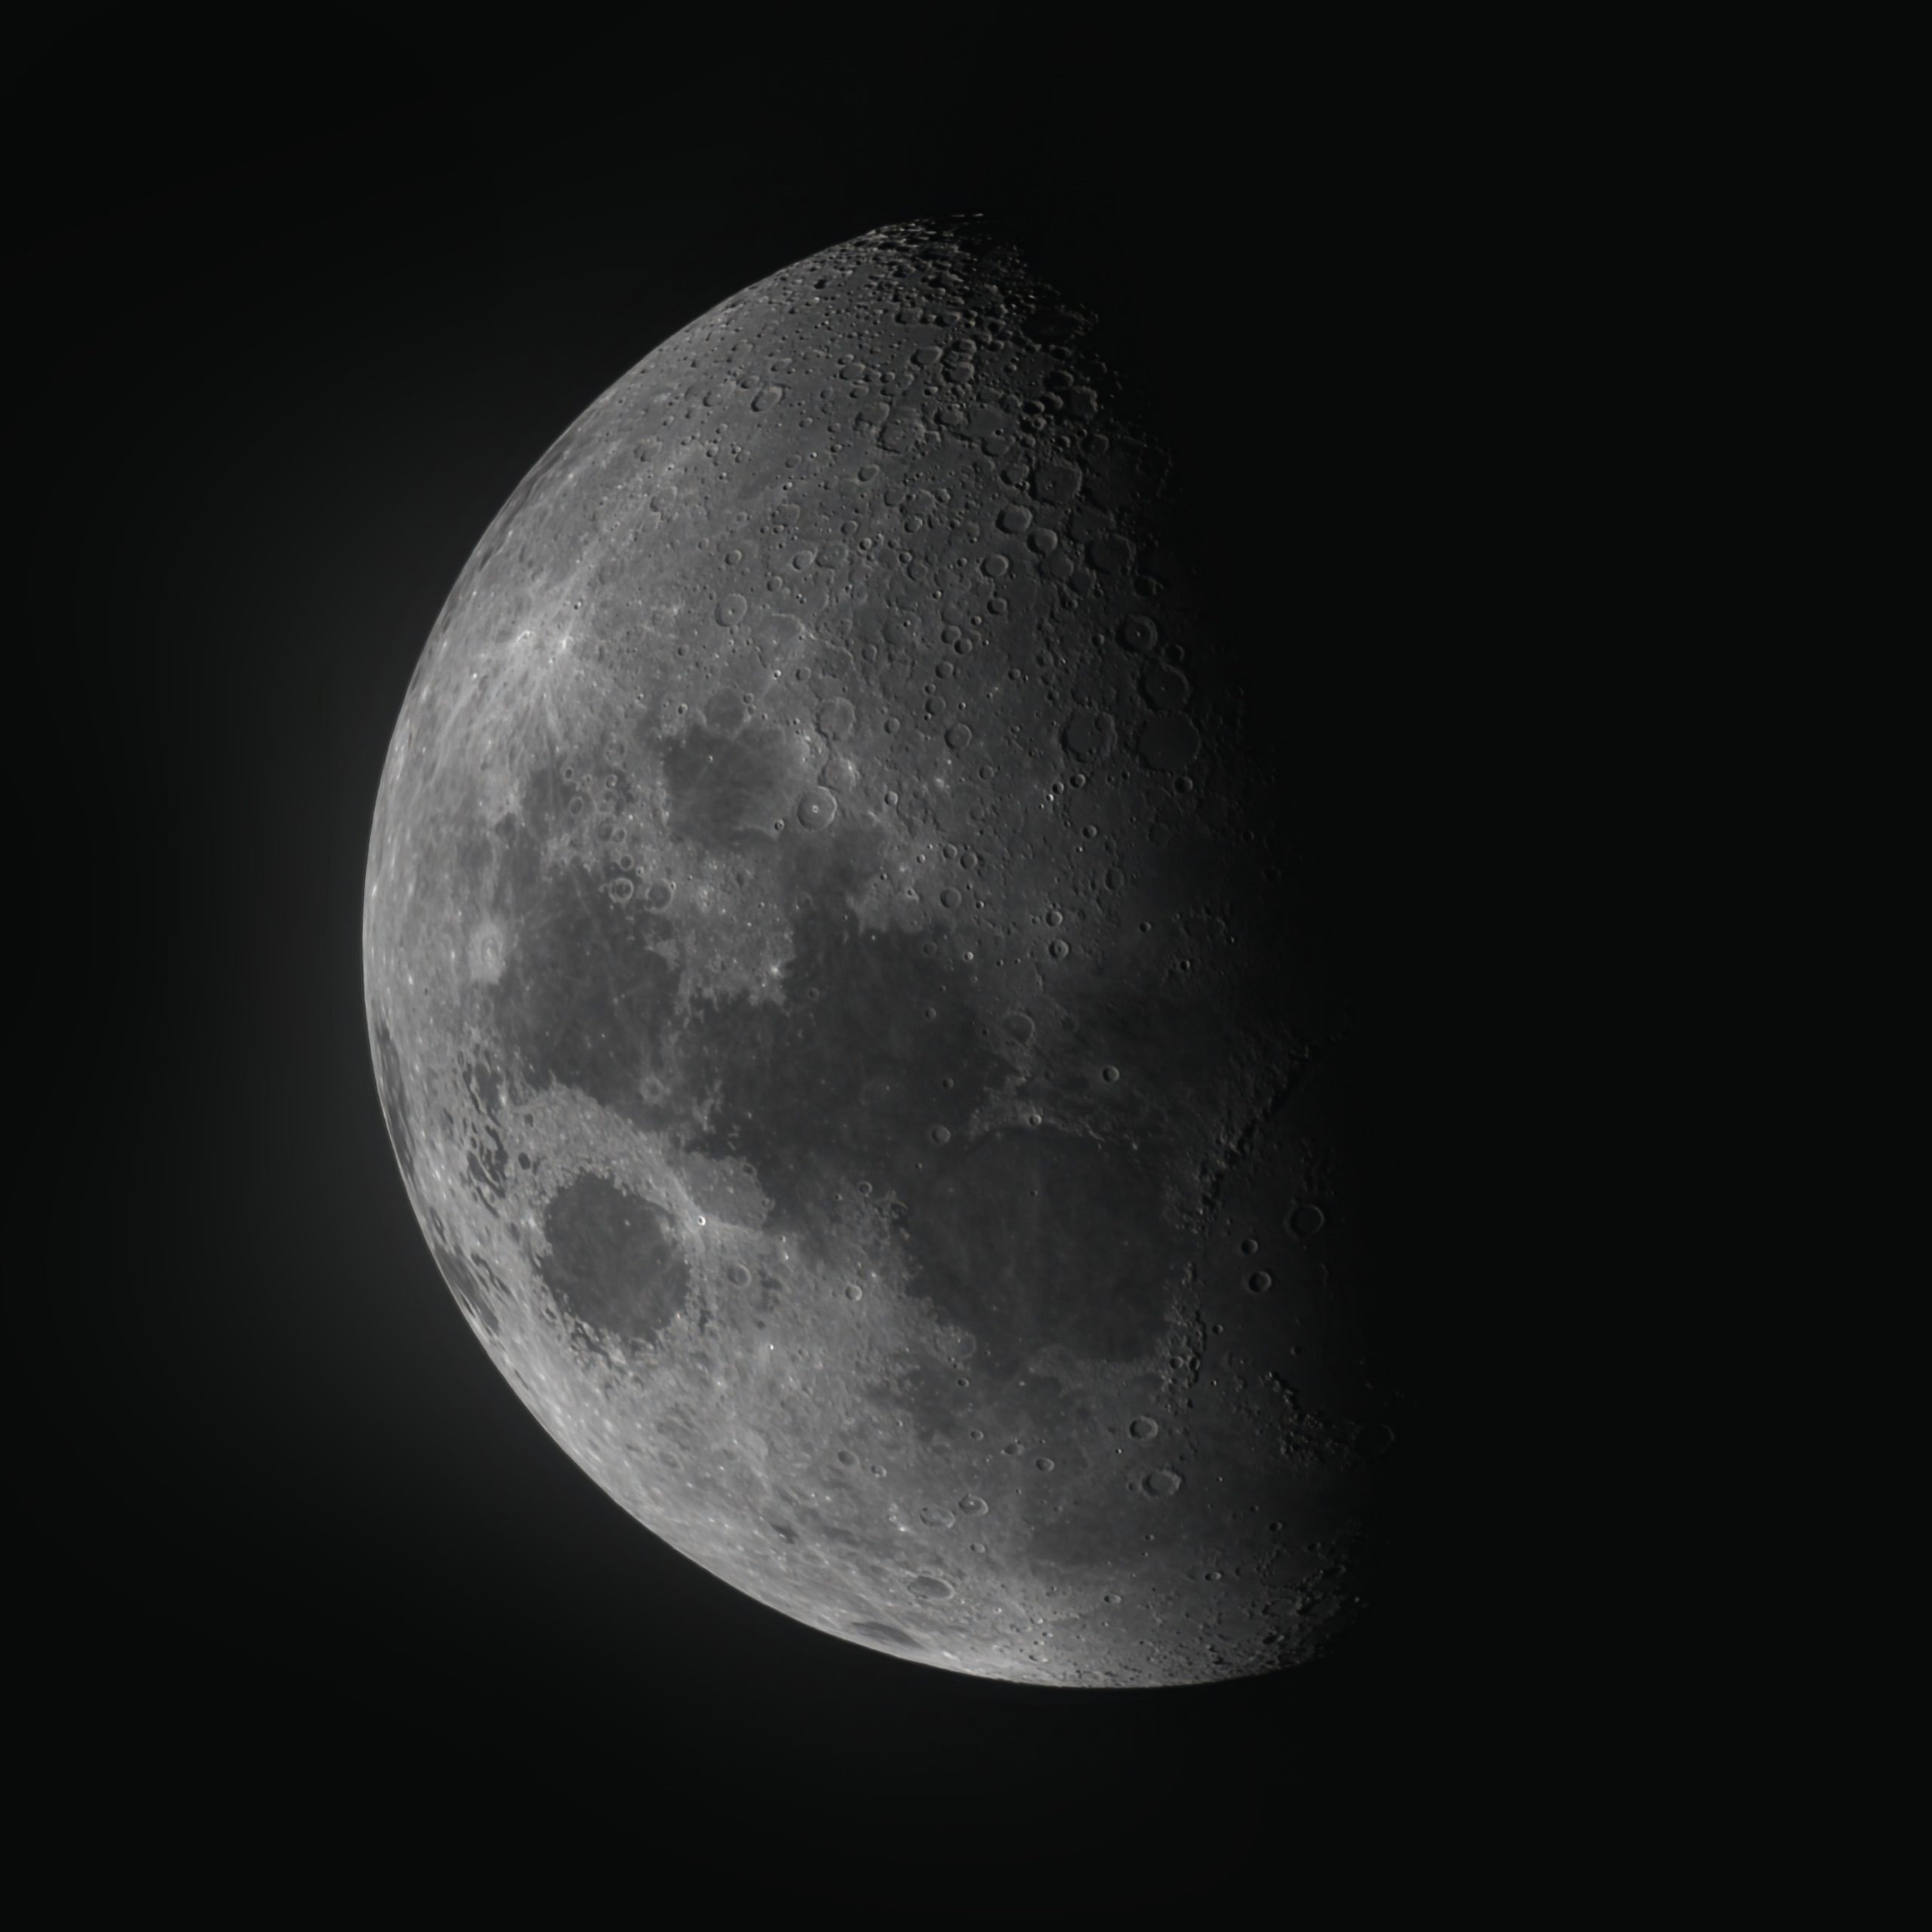
Positioned high in the northern sky for us here in the Southern Hemisphere, it was cutting a striking path through the constellation Virgo. While a Full Moon often gets all the attention, a half-lit Moon is where the real drama lives. Along the terminator line, the sharp boundary where lunar day meets night, long shadows cast across the surface, highlighting rugged mountain ranges, deep crater walls, and ancient lava plains in high contrast.
Because we are viewing from down under, the orientation offers its own distinct perspective. The sunlit portion fills from left to right, and famous surface features like Tycho Crater sit near the top of the disk. The raw scale of the lunar landscape was on full display, but capturing crisp detail through Earth’s turbulent atmosphere required a specific approach.
Lunar Close Up: Crater Highlights
Shooting with a Region of Interest (ROI) cropped down on my sensor is hands-down my favorite way to push lunar resolution. By cutting out all that empty black space, I can drive up my frame rates, keep my file sizes manageable, and really zoom in on all the detail sitting along the terminator.
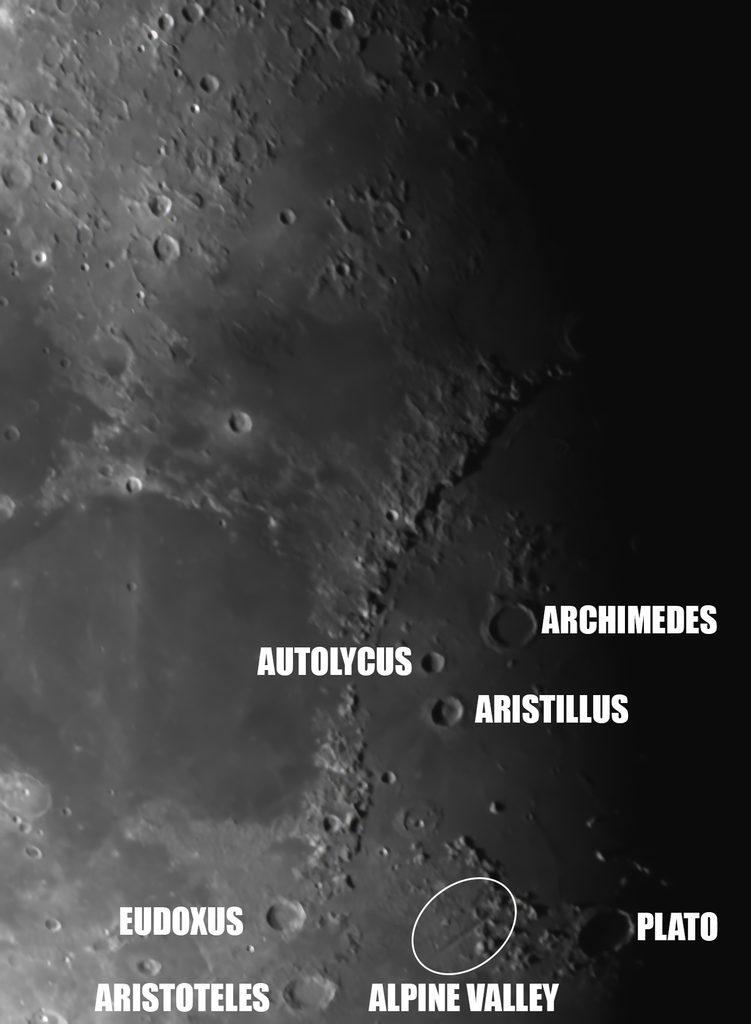
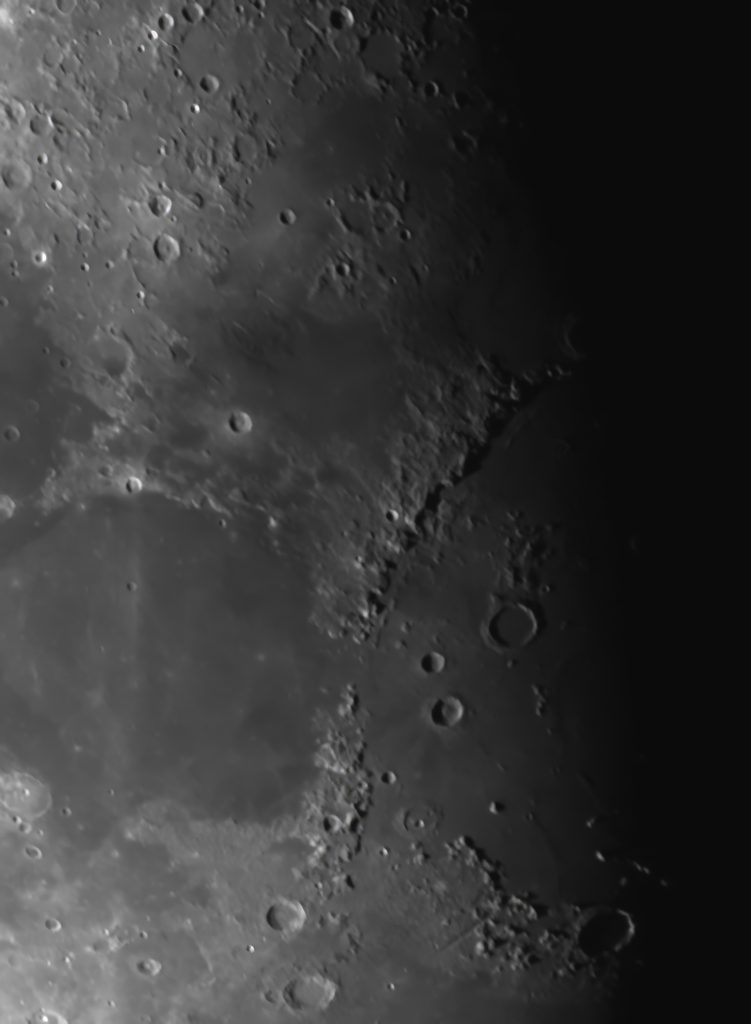
Plato
- Size: ~101 km in diameter
- What makes it interesting: Plato is one of the most famous “walled plains” on the Moon, and it stands out immediately because of its exceptionally dark, flat floor filled with ancient lava. Its jagged rim casts dramatic, needle-like shadows across the floor when the Sun hits it at a low angle. Inside, there are tiny “craterlets” that astrophotographers love using as a benchmark test for resolution and seeing quality.
Archimedes
- Size: ~81 km in diameter
- What makes it interesting: The largest crater sitting inside the Mare Imbrium basin. Like Plato, Archimedes was completely flooded by smooth lava flows billions of years ago, which buried any central peak it originally had. Its flat floor creates a really sharp contrast against the rugged, terraced walls surrounding it.
Aristillus
- Size: ~55 km in diameter
- What makes it interesting: Unlike Archimedes, Aristillus is much younger and never got flooded by lava. It features a huge, complex cluster of central peaks rising almost a kilometer off the crater floor, along with detailed terraced inner walls. Under high-angle light, you can see a massive ray system of ejecta blasted out across the surrounding mare.
Autolycus
- Size: ~39 km in diameter
- What makes it interesting: Sitting just south of Aristillus, Autolycus is a slightly smaller and older crater. Historically, the patch of mare right between Autolycus and Archimedes is a huge milestone in space exploration—back in September 1959, the Soviet probe Luna 2 crashed right here, making it the very first human-made object to reach the Moon.
Aristoteles
- Size: ~87 km in diameter
- What makes it interesting: Located near the top left of my shot, Aristoteles is a massive crater with terraced walls and a sunken, irregular floor. It forms a striking pair with nearby Eudoxus. If you look closely at the floor, you can see small off-center peaks and rough terrain instead of a single central mountain.
Eudoxus
- Size: ~67 km in diameter
- What makes it interesting: Sitting directly south of Aristoteles, Eudoxus has a sharp, well-defined rim and terraced inner slopes. It sits right where the Caucasus and Alps mountain ranges meet, making the surrounding area incredibly rugged.
Alpine Valley (Vallis Alpes)
- Size: ~166 km long and up to 10 km wide
- What makes it interesting: This one isn’t a crater, but a massive geological rift cut straight through the Montes Alpes (Lunar Alps) range, connecting Mare Imbrium to Mare Frigoris. It was formed when the Moon’s crust pulled apart. Snake-like right down the center of the valley floor is a tiny, narrow rille—an ancient lava channel—that is always a fun high-resolution challenge to try and resolve.
How I Imaged It: Taming atmospheric turbulence with “Lucky Imaging”
If you’ve ever looked at the Moon through a telescope at high magnification, you’ve probably seen it shimmering and warping like a coin sitting at the bottom of a swimming pool. That boiling effect is just atmospheric turbulence, pockets of warm and cold air constantly bending the light as it passes through.
To beat all that blurry air, I used a technique called Lucky Imaging.
Instead of taking one long single exposure, Lucky Imaging works by shooting a high frame rate video, blasting through hundreds of individual frames in just a few minutes. Because the atmosphere is constantly moving, a tiny percentage of those frames happen to catch split seconds of perfectly still air. Those are your “lucky” frames where everything looks razor sharp.
Once I had the video sequence captured, I loaded the frames into AutoStakkert!.
AutoStakkert! goes through the whole video, grades every frame for sharpness, and automatically pulls out the top percentage of the clearest shots. From there, I get it to align those frames right down to the pixel level and stack them together into a single master image. Stacking like this drops the digital noise right down, making everything smooth and letting me bring out all those subtle surface details, like crater rilles and central peaks, when I move on to final processing.
What started out as an annoying roof blocking my original target turned into a really fun session, pulling a clean, sharp view of the Moon right out of the soup.
Leave a Reply